An Introduction to Image Generation with Diffusion Models (2/2)
Hands-On Examples with HuggingFace
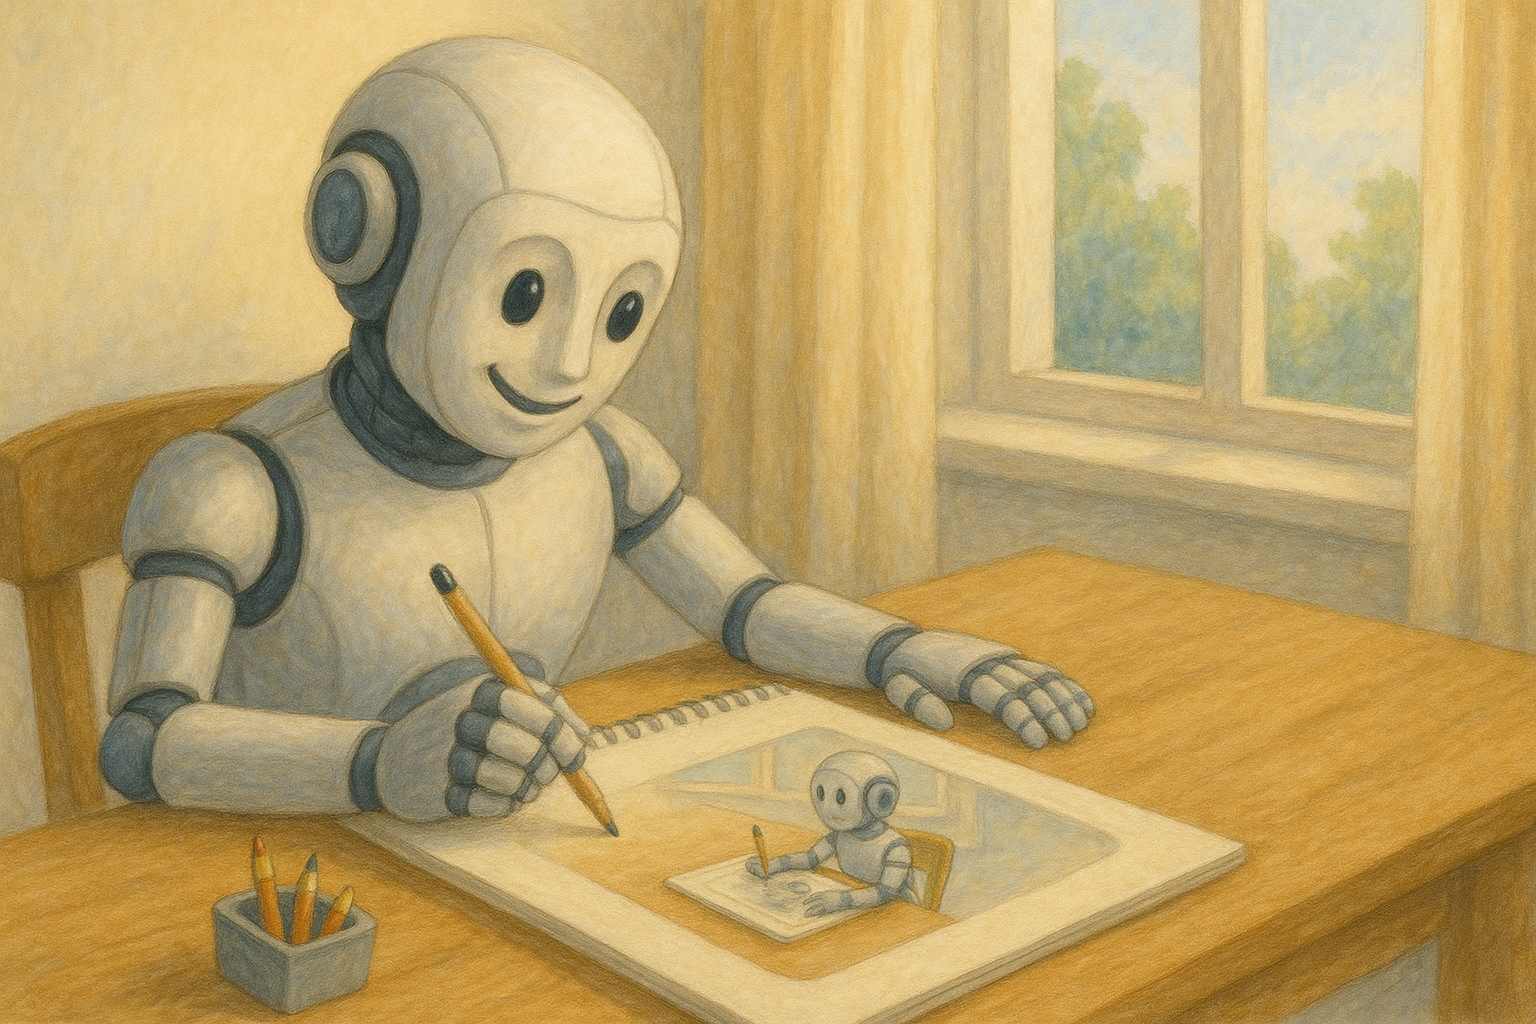 An AI drawing an AI drawing an AI... Image generated using
Dall-E 3. Prompt: A friendly humanoid robot sits at a wooden table in a bright, sunlit room, happily drawing on a sketchbook. Soft light colors, landscape, peaceful, productive, and joyful atmosphere. The robot is drawing an image of itself drawing, creating a recursive effect. Large window in the background with greenery outside, warm natural lighting.
An AI drawing an AI drawing an AI... Image generated using
Dall-E 3. Prompt: A friendly humanoid robot sits at a wooden table in a bright, sunlit room, happily drawing on a sketchbook. Soft light colors, landscape, peaceful, productive, and joyful atmosphere. The robot is drawing an image of itself drawing, creating a recursive effect. Large window in the background with greenery outside, warm natural lighting.
In just a few years, image generation has gone from “cool demo” to an almost ubiquitous tool. Variational Autoencoders (VAEs - Kingma & Welling, 2013) were followed by Generative Adversarial Networks (GANs - Goodfellow et al., 2014), and finally Denoising Diffusion Probabilistic Models (DDPMs - Ho et al., 2020) became the dominant approach, leading to systems like Stable Diffusion XL (Podell et al., 2023) or Imagen & Nano Banana.
In the first post of this series, I explain how these model families work and I walk through a minimal DDPM implementation. That DDPM is trained on car images and produces outputs like these:
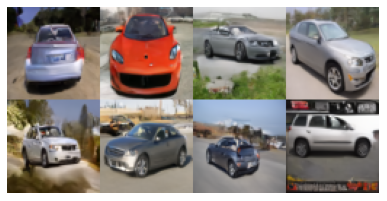 Output of a Denoising Diffusion Probabilistic Model (Ho et al., 2020) consisting of 54 million parameters, trained on the Stanford Cars Dataset (16,185 color images resized to
 64x64 pixels) for 300 epochs. Check the complete implementation here.
In this second part, I’ll focus on the practical use of diffusion models, specifically, on using the invaluable tools provided by HuggingFace. To that end, I’ve divided the post in three parts:
- A brief introduction to HuggingFace.
- A hands-on dive into some examples with HuggingFace Diffusers.
- A small in-painting application that puts everything together.
Let’s go!
A Very Brief Introduction to HuggingFace
HuggingFace has become one of the most important hubs in the machine learning community. It provides a collaborative environment where state-of-the-art datasets and models can be shared, explored and even tried directly from the browser (via Spaces). Beyond models and datasets, HuggingFace offers two particularly powerful resources:
- courses, covering key domains and techniques such as computer vision, natural language processing, audio, agents, 3D processing, reinforcement learning, and more;
- and a rich ecosystem of libraries that let us work with datasets and models end-to-end, across modalities. The most relevant ones for this post are:
-
datasets: access, share, and process audio, text, and image datasets. -
transformers: training and inference for text, vision, audio, video, and multimodal models. -
diffusers: pre-trained diffusion models for generating images, videos, and audio.
-
All of these can be installed easily in a Python environment:
pip install datasets transformers diffusers["torch"] accelerate gradio
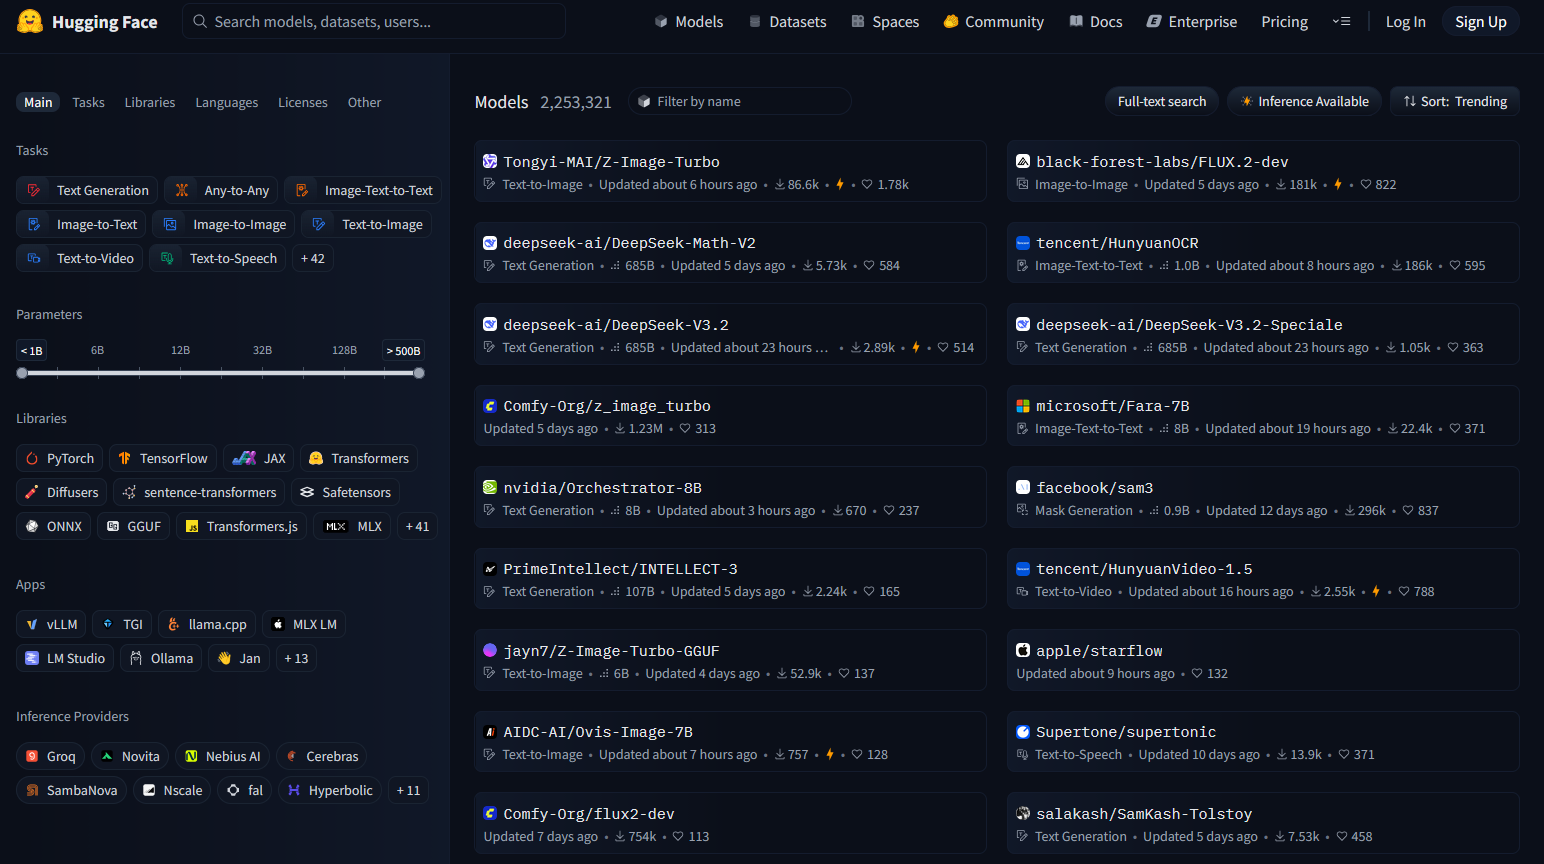 Screenshot of the HuggingFace portal, showing available models sorted by their popularity.
In practice, discriminative models (across all modalities) and generative models for text are usually handled via the transformers library. On the other hand, generative diffusion models are managed through diffusers.
Models can be browsed and selected directly from the HuggingFace website, where they can be filtered by several criteria. One of the most useful is the task, for example:
sentiment-analysistext-generationsummarizationtranslationaudio-classificationimage-to-textobject-detectionimage-segmentation- …
If we click on a model we will land on its model card page, which typically includes evaluation metrics, references, licensing information, and often a short code snippet showing how to load and run the model.
Pipelines
The easiest way to run inference with most HuggingFace models is through the pipeline interface. While each task has its own specifics, the overall pattern is remarkably consistent. As an example, here’s how a text-generation pipeline looks:
import transformers

# Load the pipeline
pipe = transformers.pipeline(
    "text-generation",  # task
    model="Organization/ConcreteModel",  # change to real model, e.g.: "openai-community/gpt2"
)

# Define the input (prompt)
messages = [
    {"role": "system", "content": "You are an AI who can draw AIs."},
    {"role": "user", "content": "What's the best technique to draw an AI?"},
]

# Generate output (text)
outputs = pipe(
    messages,
)

# Display output (text)
print(outputs[0]["generated_text"][-1])
From this (deliberately simplified) example, we can extract a common workflow:
- First, a model pipeline is loaded, by defining the task family (e.g.,
text-generation) as well as the concrete model name (e.g.,openai-community/gpt2) we want to use. - Then, we need to define the input to the pipeline; the input depends on the task at hand: if we want to classify an image, we need to load an image; if we want to generate text, we need an initial prompt of conversation history, etc.
- Finally, we pass the input to the pipeline and collect the output. The output format again depends on the task.
Instead of relying on the generic pipeline abstraction, we can also load a specific model class directly. This is particularly common when working with diffusion models. For example, a typical text-to-image setup using diffusers looks like this:
from diffusers import ConcreteModel   # change to real model, e.g.: AutoPipelineForText2Image

# Load the pipeline
pipe = ConcreteModel.from_pretrained(
    "Organization/ConcreteModel",  # change to real model, e.g.: "stabilityai/sdxl-turbo"
    ...
)

# Define the input (prompt)
prompt = "An AI drawing an AI"

# Generate output (image)
image = pipe(
    prompt=prompt,
    ...
).images[0]

# Save output (image)
image.save("example.png")
More Information on the HuggingFace Ecosystem
This brief overview barely scratches the surface of the HuggingFace ecosystem. In the next sections, I’ll focus on concrete, ready-to-use examples that build directly on these ideas.
If you’d like to explore further, here are some additional resources:
-
My guide on HuggingFace, which covers topics such as:
- Combining models with Pytorch/Tensorflow code.
- More complex pre- and post-processing steps for each task/modality, e.g.: tokenization, encoding, etc.
- Fine-tuning pre-trained models for different tasks by adding custom heads.
- Saving/loading fine-tuned models locally, as well as exporting them as ONNX for production.
- Examples with generative models of all modalities and conditioning types:
text-generation,text-to-image,text-to-video, etc.
- A comprehensive example in which I fine-tune a Large Language Model (LLM) to perform a custom text classification task.
- My notes on the exceptional book Natural Language Processing (NLP) with Transformers (Tunstall, von Werra & Wolf — O’Reilly), written by the co-founders of HuggingFace — highly recommended if you want to use
transformerseffectively.
HuggingFace Diffusers in Practice
Let’s now move from concepts to code and run a few concrete examples using the diffusers library. For this section, I’ve prepared a companion notebook:
![]()
diffusers/diffusers_and_co.ipynb
In this post, I’ll focus on showing and discussing the results produced by different models. If you want to see the full (and commented) code, I recommend opening the notebook alongside the article.
Hardware note: To run the notebook locally, you’ll need a GPU setup with at least 12 GB of VRAM. As an alternative, you can use a Google Colab instance with a NVIDIA T4, or similar.
Stable Diffusion XL Turbo
The first example in the notebook covers a conditioned image generation task, specifically text-to-image, using the Stable Diffusion XL Turbo model. The code closely follows the patterns introduced in the previous section:
from diffusers import AutoPipelineForText2Image

# Load the SDXL-Turbo text-to-image pipeline
pipe = AutoPipelineForText2Image.from_pretrained(
    "stabilityai/sdxl-turbo",
    torch_dtype=torch.float16,
    variant="fp16"
)

prompt = """
A friendly humanoid robot sits at a wooden table in a bright, sunlit room, happily drawing on a sketchbook.
Soft light colors, landscape, peaceful, productive, and joyful atmosphere.
The robot is drawing an image of itself drawing, creating a recursive effect.
Large window in the background with greenery outside, warm natural lighting.
"""

# Seed for reproducibility
rand_gen = torch.manual_seed(148607185)

# Generate an image based on the text prompt
image = pipe(
    prompt=prompt,
    num_inference_steps=1, # 1 for sdxl-turbo, 25-50 for SD
    guidance_scale=1.0, # 1 for sdxl-turbo, 6-10 for SD
    negative_prompt=["overexposed", "underexposed"],
    generator=rand_gen
).images[0]
The result is already quite impressive, but it also clearly reveals its synthetic nature. Subtle artifacts appear in areas like eyes and fingers, and some mechanical structures lack global consistency or realism — typical issues when pushing generation speed to the extreme.
 Image generated with SDXL Turbo.
Prompt: A friendly humanoid robot sits at a wooden table in a bright, sunlit room, happily drawing on a sketchbook. Soft light colors, landscape, peaceful, productive, and joyful atmosphere. The robot is drawing an image of itself drawing, creating a recursive effect. Large window in the background with greenery outside, warm natural lighting.
Image generated with SDXL Turbo.
Prompt: A friendly humanoid robot sits at a wooden table in a bright, sunlit room, happily drawing on a sketchbook. Soft light colors, landscape, peaceful, productive, and joyful atmosphere. The robot is drawing an image of itself drawing, creating a recursive effect. Large window in the background with greenery outside, warm natural lighting.
Stable Diffusion XL Turbo is a real-time text-to-image diffusion model derived from Stable Diffusion XL (SDXL). Its key feature is that it can generate images in as few as one to four denoising steps. Unlike traditional diffusion models (which often require dozens of inference steps) SDXL Turbo prioritizes latency and interactivity, while still preserving much of SDXL’s visual quality.
This speedup is achieved through Adversarial Diffusion Distillation (ADD):
- A large, high-quality SDXL model acts as a teacher.
- The Turbo model is trained to match the teacher’s output distribution.
- An adversarial objective helps close the quality gap introduced by aggressive step reduction.
In short, a large model is distilled into a much faster one, enabling real-time image generation in creative tools and user interfaces.
Playground V2
An interesting alternative to SDXL Turbo is Playground V2. This model also targets high-quality image generation with fewer inference steps, but it takes a different approach: it prioritizes visual quality and aesthetics and it does not rely on distillation during training. Using the same prompt, Playground V2 produces a different output:
 Model: Playground V2.
Same prompt ad before: A friendly humanoid robot sits at a wooden table...
Model: Playground V2.
Same prompt ad before: A friendly humanoid robot sits at a wooden table...
Combining Models
Diffusion models don’t have to be used in isolation — they can also be chained together! In the next example, SDXL Turbo first generates an image of a puppy. That image is then used as conditioning input for the image-to-image model Kandinsky 2.2. The result is an exaggerated image of a dog, but I think it showcases the potential of building such compositional pipelines.
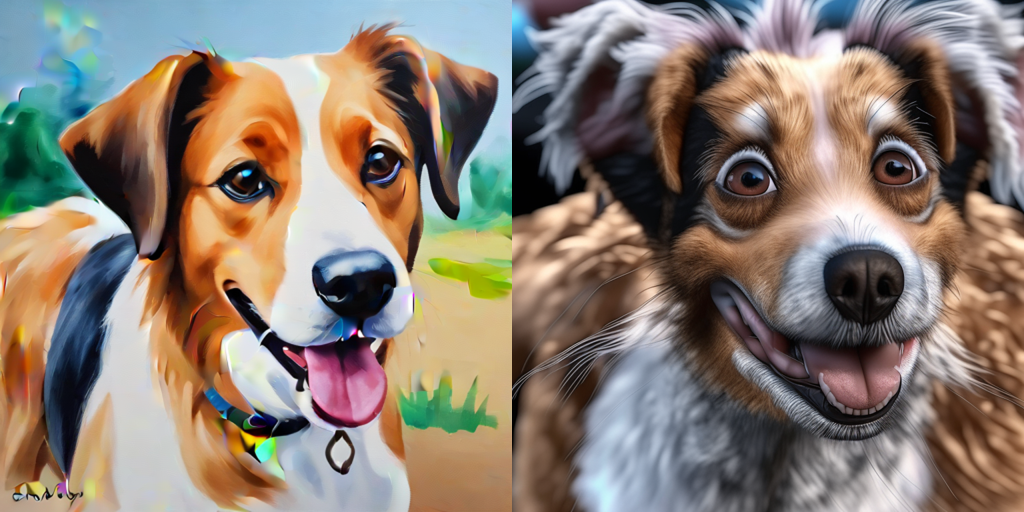 Left image generated by SDXL Turbo.
Right image generated by Kandinsky Prior 2.2.
Left prompt: A painting of a friendly dog painted by a child.
Right prompt: A photo of a friendly dog. High details, realistic (negative: low quality, bad quality).
Left image generated by SDXL Turbo.
Right image generated by Kandinsky Prior 2.2.
Left prompt: A painting of a friendly dog painted by a child.
Right prompt: A photo of a friendly dog. High details, realistic (negative: low quality, bad quality).
Kandinsky is a multimodal diffusion model that separates semantic understanding from image generation. Unlike SDXL-style models, which directly condition image generation on text embeddings, Kandinsky uses a two-stage architecture:
- Prior model, which maps text (and optionally images) into a shared latent space that represents high-level semantics.
- Decoder model (diffusion), which takes these semantic embeddings and generates the final image via a diffusion process.
This explicit separation makes Kandinsky particularly well suited for compositional pipelines. One such pipeline consists in in-painting, i.e.: we ask the model to generate a sub-image on a provided initial image. Here’s how it works:
- Mask definition: A binary mask specifies which regions of the image should be regenerated (white) and which should remain fixed (black).
- Latent conditioning: The unmasked parts of the image are encoded and injected into the diffusion process, anchoring the generation spatially.
- Semantic guidance via the prior: Text prompts and optional image context guide what should appear in the masked regions.
- Diffusion-based regeneration: Noise is added only in the masked area, and the model denoises it while respecting both the surrounding visual context and the semantic intent from the prompt.
Because Kandinsky reasons at a semantic level first, inpainting results tend to be context-aware: lighting, perspective, and style are usually consistent with the original image, even when the prompt introduces new elements.
Here’s an example with the popular oil painting The Girl with the Pearl Ear-ring from Vermeer. Unfortunately, the pearl ear-ring doesn’t survive the process ![]()
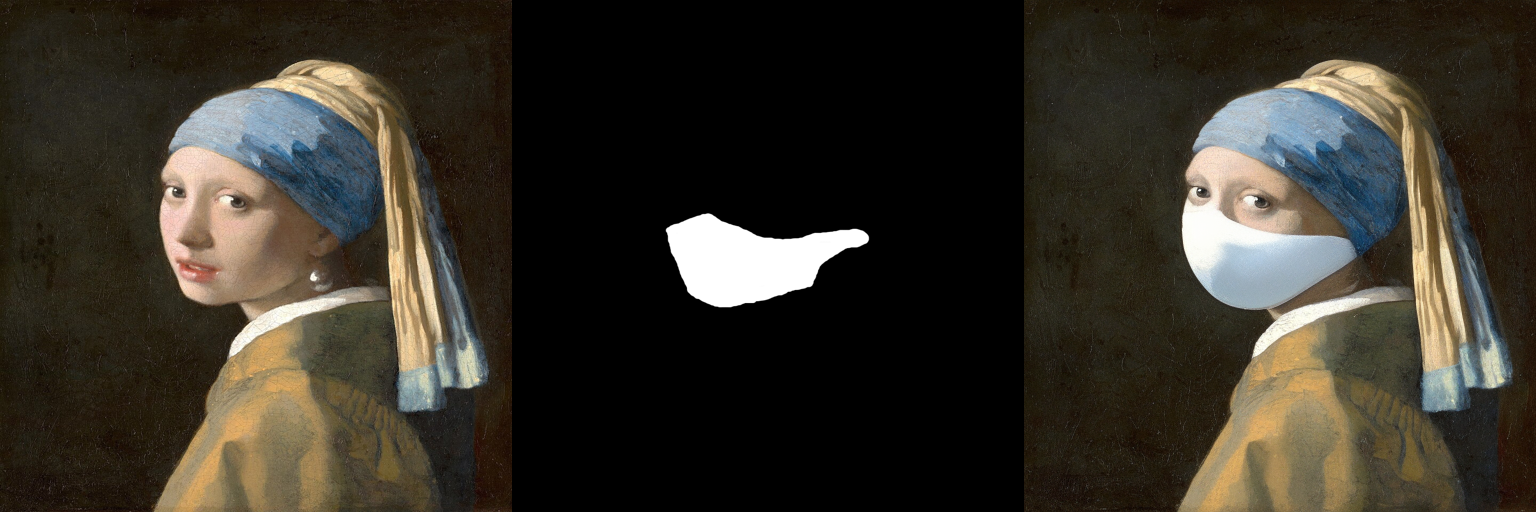 Model: Kandinsky Inpaint 2.2.
Prompt: Oil painting of a woman wearing a surgical mask, Vermeer (negative: bad anatomy, deformed, ugly, disfigured).
I obtained the image from the Wikipedia and draw the mask manually.
Check this piece from Banksy, if you would like to know how this could be done differently.
Model: Kandinsky Inpaint 2.2.
Prompt: Oil painting of a woman wearing a surgical mask, Vermeer (negative: bad anatomy, deformed, ugly, disfigured).
I obtained the image from the Wikipedia and draw the mask manually.
Check this piece from Banksy, if you would like to know how this could be done differently.
Building Proof-of-Concept Applications: Zero-Shot Segmentation and In-Painting
As shown in the notebook diffusers/diffusers_and_co.ipynb, running different models for isolated tasks is already quite straightforward. This naturally leads to the next question:
What if we combine several models to build small, interactive applications?
Along these lines, I implemented a simple proof-of-concept: inpainting_app. The idea behind it is to chain segmentation and diffusion-based in-painting into a single workflow:
- First, we load an image and select a few points on the region we want to modify (typically the foreground).
- Next, the Segment Anything Model (SAM) from Meta generates a segmentation mask for that region. Everything outside the mask is treated as background. SAM is a vision transformer capable of zero-shot segmentation, but it still requires some minimal guidance (points or a bounding box) to specify the region of interest.
- Finally, we select either the foreground or the background region and run the in-painting version of SDXL model. The selected region is regenerated according to a text prompt, while remaining visually consistent with the rest of the image.
As before, if you plan to run the app locally you’ll need a GPU setup with at least 12 GB of VRAM ![]() .
.
UI and Application Structure
The application is built using Gradio, a Python library similar to Streamlit which builds nice-looking, web-based GUIs. Since Gradio is developed by HuggingFace, it integrates seamlessly with the models used here.
If you want a deeper introduction to Gradio, you can check my Gradio Quickstart Guide, where I cover the basics and several advanced patterns.
The structure of the app is intentionally simple:
- The GUI and the app structure are controlled by
app.py. The entry point isapp.generate_app(), which takes two functions as inputs:- a function that performs image segmentation given a set of user-selected points,
- and a function that runs in-painting given an image, a mask, and a prompt.
- The notebook
inpainting.ipynbdefines and prepares those input functions:run_segmentation(raw_image, input_points, processor, model, ...) -> input_maskrun_inpainting(raw_image, input_mask, prompt, pipeline, ...) -> generated_image
- Internally,
app.generate_app()creates agradio.Blockslayout, which is composed ofgradio.Row()sections that contain the UI widgets: image canvases, sliders, text boxes, buttons, etc. These widgets are connected to callback functions; for instance: when we select points in the uploadedraw_image, the callbackon_select()is invoked, which under the hood executesrun_segmentation()using the uploadedraw_imageand the selectedinput_points.
While everything could be packaged into standalone modules, keeping part of the logic in a notebook makes experimentation much easier and encourages rapid iteration.
The Result
When the application is launched via app.generate_app(), the user sees the following UI in http://localhost:8080:
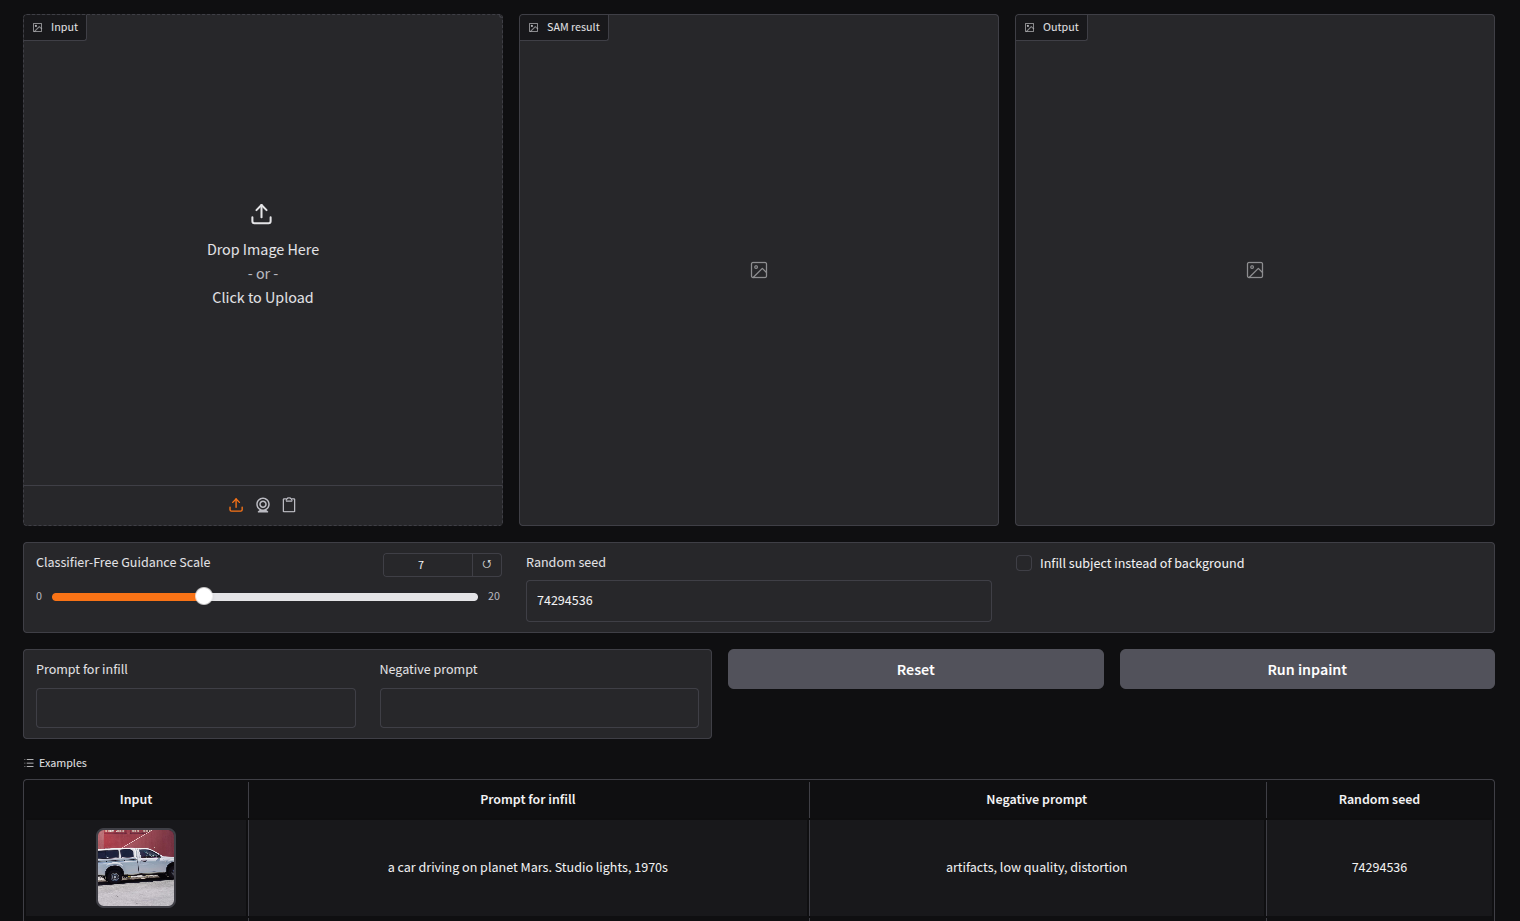 The Graphical User Interface (GUI) or our application.
So how does it perform? Let’s look at an example.
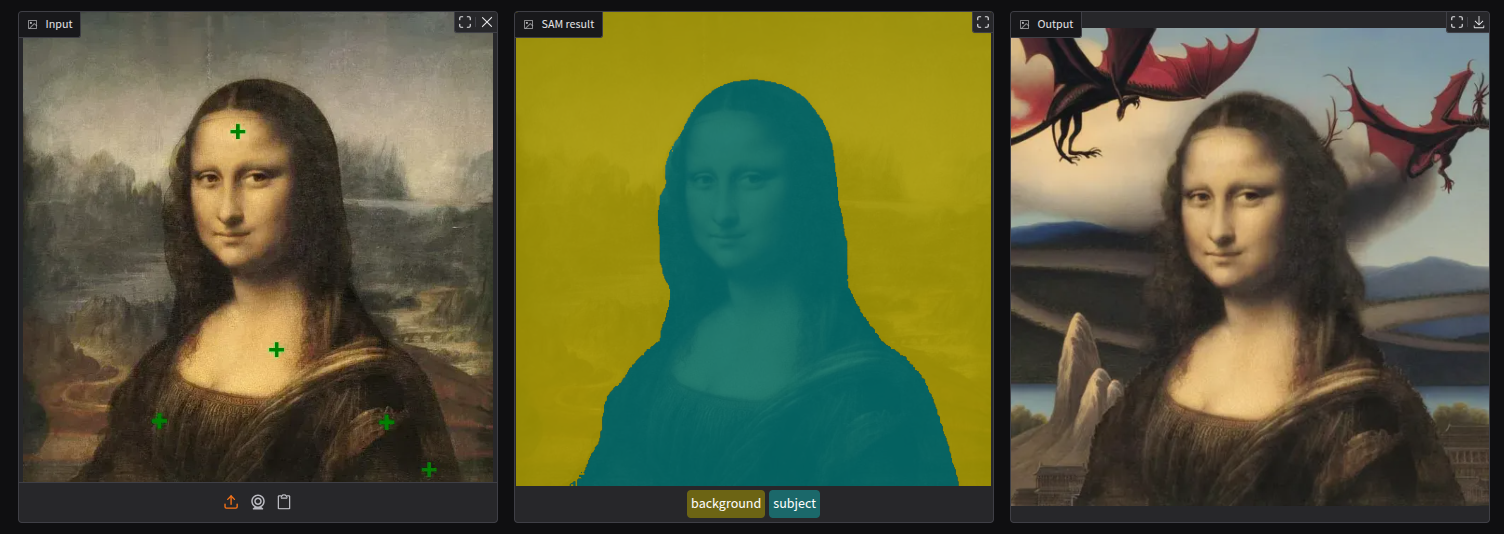 Monalisa re-imagined. SAM (Segment Anything Model) is used to segment foreground (green) & background (yellow), and Stable Diffusion XL Inpainting to re-generate the selected region.
Prompt (applied to the background): A fantasy landscape with flying dragons (negative: artifacts, low quality, distortion).
Monalisa re-imagined. SAM (Segment Anything Model) is used to segment foreground (green) & background (yellow), and Stable Diffusion XL Inpainting to re-generate the selected region.
Prompt (applied to the background): A fantasy landscape with flying dragons (negative: artifacts, low quality, distortion).
I think that the result shows that the pipeline produces a visually coherent image: the new background blends naturally with the original painting’s lighting, perspective, and color palette. Despite the strong semantic change introduced by the prompt, the Mona Lisa remains intact and consistent, which highlights how well segmentation and diffusion-based in-painting can work together even in artistic, non-photographic domains.
Wrap Up
In this second post, we moved from theory to practice and explored how modern diffusion models can be used out of the box with HuggingFace tools. I covered how to run state-of-the-art text-to-image models with diffusers, how different diffusion architectures trade off speed and quality, and how combining models enables more powerful workflows such as segmentation-aware in-painting.
Beyond individual examples, the main takeaway is how composable today’s generative models have become. By chaining pre-trained components—segmentation, conditioning, and diffusion—we can quickly prototype creative and practical applications without training models from scratch.
If you want to dig deeper, here are some useful starting points:
I’m curious to hear your thoughts:
What real-world or creative use case do you think would benefit most from this kind of segmentation-guided in-painting app? Do you know some businesses using similar pipelines?